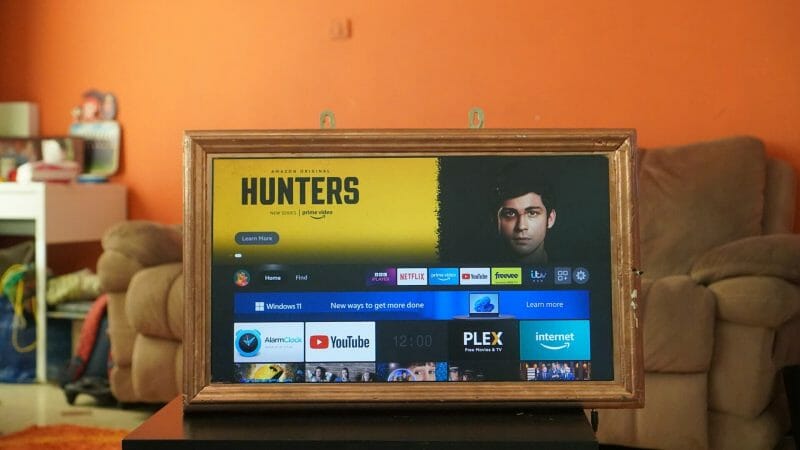
Want to be able to record your favorite shows or movies on your Youtube TV Firestick? Here’s how to do it!
Quick Summary: Use your remote to move through the YouTube TV menus on your Firestick so you can record every episode of your favorite show. Find the show you want to record and click “Add.” The show will appear in your DVR library, and new episodes will be added as they air.
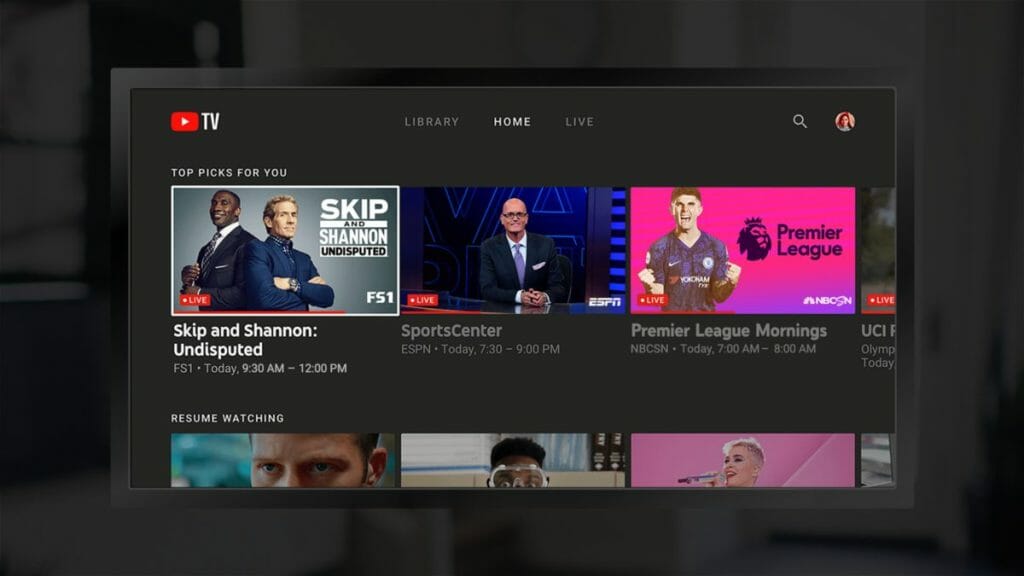
We’ll go into more details below:
Recording a Show’s Entire Season on a YouTube TV Firestick
YouTube TV most likely already exists on your Amazon Firestick streaming device. If not, you can get it from the app store on Amazon. You’ll need to sign up for the service by paying a particular monthly cost if you want to use the app.
Use your firestick device’s remote control to browse the YouTube TV menus and record every episode of your favorite show.
Step 1. After selecting the program you want to record and clicking Add, it will show up in your DVR library and start to accumulate new episodes as they come out.
Step 2. Add an indicator, which will change from a plus sign to a checkmark to indicate that it has been recorded.
Step 3. Choose “Library” from YouTube TV’s top menu when you’re ready to watch the program you’ve taped. You will then get a list of all the currently recorded programs in your DVR library.
Step 4. Choose the show you want to watch, then pick the particular episode.
All the shows you record for the next nine months will be available in your library.
You may wish to delete some of the shows at some point. Navigate to the program you want to unsubscribe from and click the checkbox icon. Then the icon will change to a plus sign. Follow the procedure outlined above to add that show to the library once more.
Please be aware that YouTube TV is not compatible with Fire TV and Fire TV Stick models from the first generation. With YouTube TV, most other Amazon streaming devices function reasonably well. These include the first and second iterations of the fire TV cube and the second and third iterations of the Fire TV and Fire TV Stick.
Record Firestick Shows using EaseUS RecExperts
Step 1. Launch EaseUS RecExperts. For screen recording, you can choose between “Full Screen” and “Region.” If you select “Full Screen,” it will save the whole screen.

Step 2. If you choose “Region,” this software will ask you to customize the area where the recording will take place. Make sure that everything you want to capture fits inside the select box.
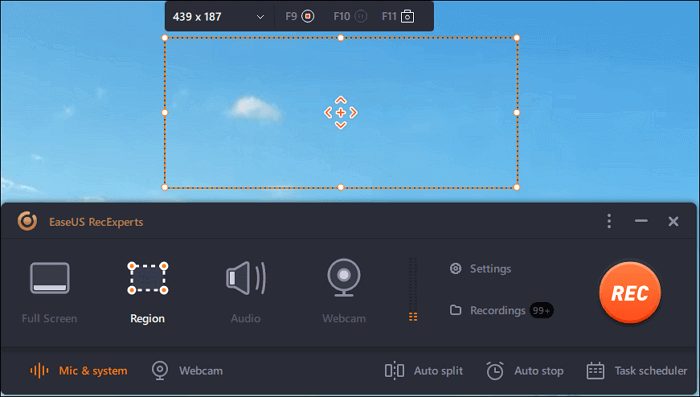
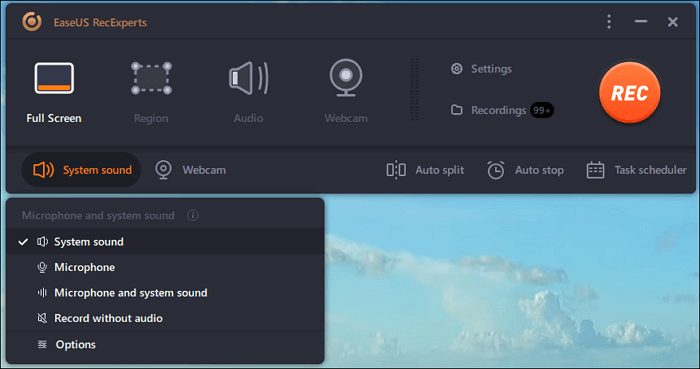
Step 3. If you tap the button at the bottom left of the main screen, you’ll see a list of choices. This recorder can record both the sound from the microphone and the sound from the system. You can change the volume and microphone with the “Options” button.
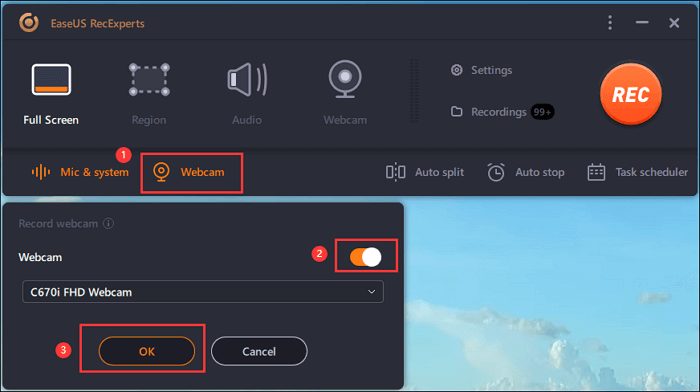
Step 4. Click on the “Webcam” icon at the bottom of the screen to record the webcam simultaneously. Tap the button to start recording with the webcam. A drop-down menu will let you choose the recording device. Click “OK” to make sure your settings are correct.
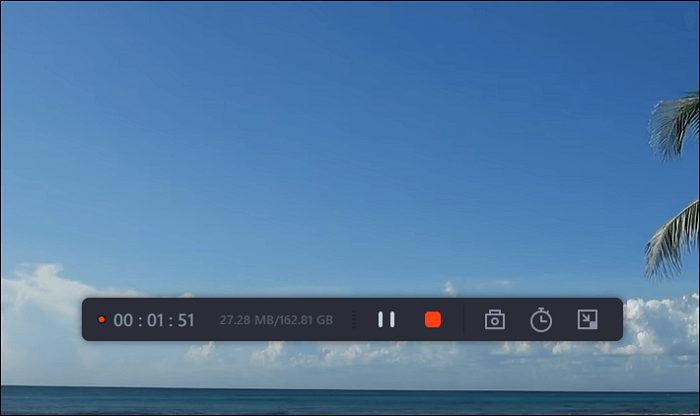
Step 5. When you return to the main interface, click the “REC” button to start recording. During the recording process, you can pause or stop the recording with regulators on a toolbar that floats above the screen. You can also use the camera icon to take screenshots, and the timer icon can help you stop it on its own.
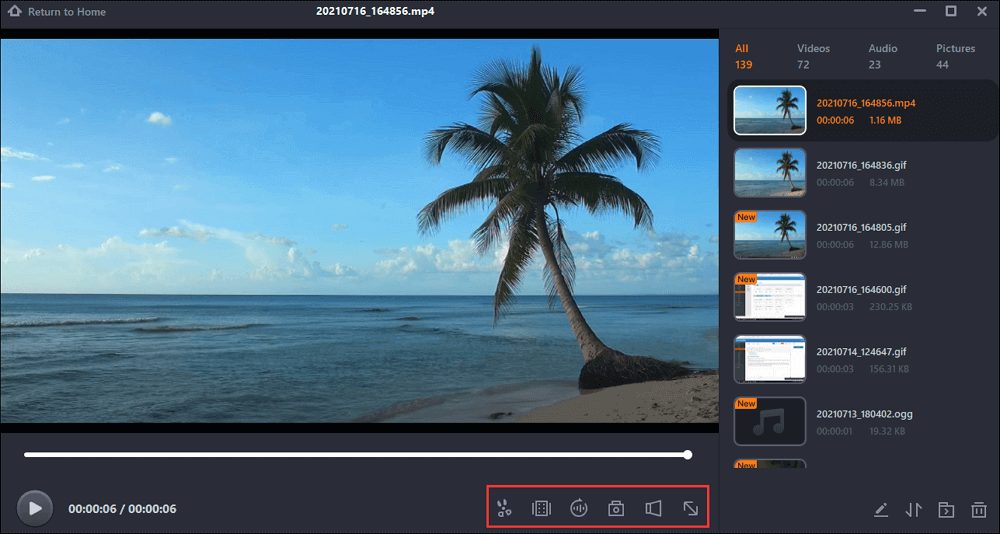
Step 6. Your computer will store the video clips that you record. When the media player comes up, you’ll see a set of tools that you can use to trim the recordings, extract the audio, and add a title and credits to the beginning and end of the saved video.
Wrapping Up
Recording live TV on the Firestick can be tedious, but it can be done. Finding the right method for you is important, but we hope this article helps you get started.
Take a look at some of our related articles below.
Video References
CSS

